
Moultrie Pro Hunter 2 Manual: A Comprehensive Guide
This manual details setup, operation, and troubleshooting for the Pro Hunter 2 feeder system, including battery installation, timer configuration, and remote monitoring via FEED HUB․
Learn to optimize feed schedules for deer, address common issues, and ensure long-term feeder performance with detailed instructions and helpful tips for successful wildlife management․
Explore advanced features like the digital timer and ten feed time settings, alongside maintenance guidelines for cleaning, winterizing, and storing your Pro Hunter 2 effectively․
The Moultrie Pro Hunter 2 represents a significant advancement in automated deer feeding technology, offering hunters a reliable and versatile solution for attracting and monitoring wildlife․ This feeder system is designed for ease of use, featuring a digital timer with ten programmable feed times, allowing for precise control over feeding schedules․
Built with durability in mind, the Pro Hunter 2 is constructed to withstand the elements and provide consistent performance season after season․ Its 6-volt operation ensures efficient power consumption, while the substantial feed capacity minimizes the frequency of refills․
Furthermore, integration with the Moultrie FEED HUB enables remote monitoring and control, providing peace of mind and valuable insights into feeder operation․ This introduction will guide you through the system’s components, setup, and advanced features, empowering you to maximize its benefits for your hunting efforts․ Understanding these aspects will ensure optimal performance and successful wildlife management․
Understanding the Key Components
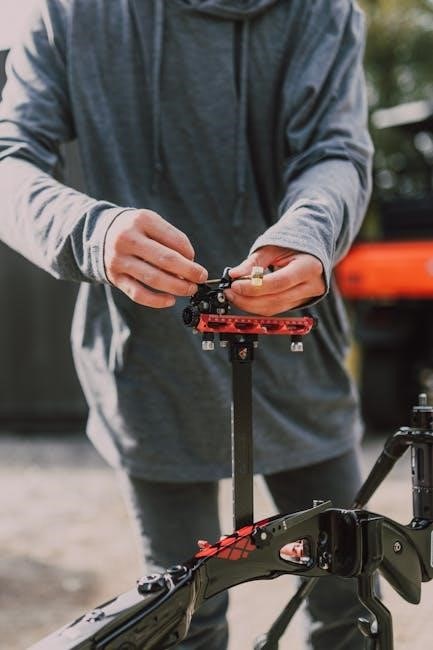
The Moultrie Pro Hunter 2 feeder system comprises several essential components working in harmony․ The core is the feeder housing, constructed to protect feed from the elements and wildlife․ A robust 6-volt motor drives the dispensing mechanism, ensuring reliable feed distribution․ The digital timer, a central control unit, allows for precise programming of feed times and durations․
Crucially, the system includes a hopper designed for substantial feed capacity, reducing refill frequency․ The power source, typically batteries, provides the energy for operation․ Additionally, compatibility with the Moultrie FEED HUB adds remote monitoring capabilities․
Understanding the interplay of these components is vital for effective operation and maintenance․ Proper assembly and awareness of each part’s function will contribute to the longevity and performance of your Pro Hunter 2 feeder, maximizing its value in your wildlife management strategy․

Setting Up Your Pro Hunter 2
Proper setup involves installing batteries, configuring the timer, setting the current time, and programming feed schedules for optimal performance and reliable operation․
Ensure accurate timer functionality and adjust run durations to meet your specific feeding needs and wildlife management goals․
Installing the Battery
Before initiating setup, ensure the Pro Hunter 2 feeder is completely powered off․ Locate the battery compartment, typically secured with latches or screws, and carefully open it․ The Pro Hunter 2 utilizes a 6-volt battery to power its operations, and it’s crucial to use a battery of the correct voltage for optimal performance and to prevent potential damage to the feeder’s internal components․
Connect the battery terminals, observing the correct polarity – positive to positive and negative to negative․ Incorrect polarity can cause irreversible damage․ Securely fasten the battery within the compartment, ensuring it doesn’t shift during operation․ Close and latch the battery compartment tightly to protect the battery from the elements and maintain a secure connection․
After installation, a brief self-test may occur, confirming battery connection․ If the feeder doesn’t respond, double-check the battery polarity and connection․ A fully charged battery is essential for accurate timer settings and consistent feed dispensing․
Configuring and Testing the Feeder
Following battery installation, the Pro Hunter 2 requires initial configuration․ Begin by verifying the feeder’s power status – the digital display should illuminate․ Access the programming mode, typically through a button sequence detailed in the full manual․ Set the current time and date accurately, as this forms the foundation for scheduled feed times․
Next, estimate the remaining feed volume within the hopper․ This helps the feeder calculate dispensing durations․ Proceed to a preliminary test by manually triggering a short feed dispensing cycle․ Observe the feed flow, ensuring it’s consistent and unobstructed․ Adjust the feed exit if necessary to prevent clogging or uneven distribution․
Confirm the timer is functioning correctly by setting a short test feed time․ Monitor the feeder to verify it dispenses feed at the programmed time and for the correct duration․ This initial test is crucial for identifying any operational issues before relying on automated feeding schedules․

Setting the Current Time
Accurate time setting is paramount for the Pro Hunter 2’s automated feeding functionality․ Access the time setting mode through the feeder’s control panel, usually involving pressing and holding the ‘Set’ or ‘Mode’ button․ The display will begin to flash, indicating the hour setting․ Use the ‘Up’ and ‘Down’ buttons to adjust the hour to the correct value․
Once the hour is set, proceed to the minute setting․ The display will automatically transition to the minute field․ Again, utilize the ‘Up’ and ‘Down’ buttons to accurately set the current minute․ Confirm your selections by pressing the ‘Set’ or ‘Enter’ button․
Verify the displayed time against a reliable time source․ Incorrect time settings will result in feed dispensing at unintended times․ Some models may also require setting the date, ensuring complete synchronization for optimal scheduling․
Programming Feed Times
The Pro Hunter 2 boasts ten programmable feed times, offering exceptional flexibility in scheduling․ Access the feed time programming mode via the control panel, typically by pressing the ‘Set’ or ‘Mode’ button until the feed time display appears․ The first feed time slot will flash, indicating it’s ready for programming․
Utilize the ‘Up’ and ‘Down’ buttons to set the desired hour and minute for the first feed time․ Confirm your selection with the ‘Set’ or ‘Enter’ button․ The display will then automatically advance to the next feed time slot․ Repeat this process for each of the ten available feed times․
Consider deer behavior and local hunting regulations when setting feed times․ Strategically spaced feedings can maximize attraction and minimize competition․ Remember to save your programmed feed times before exiting the programming mode․
Adjusting Run Duration
The run duration setting controls how long the feeder motor operates during each scheduled feed time․ Access this setting through the control panel, usually by navigating through the menu options using the ‘Set’ or ‘Mode’ button until ‘Run Duration’ is displayed․ The current run duration will then flash, indicating it’s adjustable․
Employ the ‘Up’ and ‘Down’ buttons to modify the run duration, typically measured in seconds․ A shorter duration dispenses less feed, while a longer duration dispenses more․ Carefully consider the amount of feed you want to distribute per feeding and the size of the deer population you’re targeting․
Test your chosen run duration to ensure it delivers the desired amount of feed․ Save the adjusted run duration before exiting the settings menu․ Regularly monitor feed levels to fine-tune the duration for optimal performance․
Testing the Timer Functionality
After programming feed times, thoroughly test the timer to confirm accurate operation․ Initiate a manual test by accessing the timer test mode within the control panel’s menu․ This typically involves pressing and holding a designated button, or navigating through the settings until a ‘Test’ option appears․
Observe the feeder motor during the test to verify it activates at the programmed times and for the correct duration․ Ensure the dispensing mechanism functions smoothly and delivers feed as expected․ Pay attention to any unusual noises or malfunctions during the test cycle․
Repeat the test for each programmed feed time to validate the entire schedule․ Correct any discrepancies immediately before relying on the automatic feeding system․ Consistent testing ensures reliable operation and prevents wasted feed․

Advanced Features & Operation
Unlock the Pro Hunter 2’s full potential with its digital timer and ten feed time settings, optimizing schedules for peak deer activity and efficient feed distribution․
Explore remote monitoring capabilities via the Moultrie FEED HUB, gaining real-time insights into feeder operation and receiving low-feed alerts for timely refills․
Utilizing the Digital Timer
The Moultrie Pro Hunter 2 boasts a sophisticated digital timer, allowing for precise control over feeding schedules․ Access the timer settings through the control panel, navigating with the intuitive button interface․ Setting the current time is crucial for accurate operation; ensure it reflects the correct date and time zone․
Programming feed times is straightforward, with the ability to set up to ten distinct feeding events per day․ Each feed time can be customized with specific days of the week and a designated run duration․ The timer’s flexibility enables hunters to adapt to changing deer patterns and optimize feed delivery․
Experiment with different schedules to determine what best attracts deer to your hunting area․ Remember to test the timer functionality after each adjustment to confirm proper operation․ The digital timer is a key component in maximizing the effectiveness of your Pro Hunter 2 feeder․
Understanding the 10 Feed Time Settings
The Moultrie Pro Hunter 2 features ten programmable feed time settings, offering unparalleled flexibility in managing your deer feeding strategy․ Each setting allows you to designate a specific time of day for feed disbursement, catering to varying deer activity patterns․ You can individually select which days of the week each feed time will activate, creating a customized schedule․
Utilize these settings to mimic natural feeding times, or to strategically draw deer to your location during peak hunting hours․ The run duration for each feed time is also adjustable, controlling the amount of feed dispensed per event․
Consider staggering feed times to maintain consistent deer activity throughout the day․ Experimentation is key to discovering the optimal settings for your specific location and deer population․ Properly utilizing all ten feed time settings maximizes the Pro Hunter 2’s potential․
Optimizing Feed Schedules for Deer
Effective deer feeding relies on understanding their natural behaviors․ Begin by observing deer activity patterns in your area – when are they most active? Utilize the Pro Hunter 2’s ten feed time settings to align with these periods, particularly dawn and dusk․ Staggering feed times throughout these peak hours encourages consistent visitation․
Consider seasonal changes․ Deer require more energy during colder months and breeding season, necessitating increased feed amounts and potentially more frequent dispensing․ Adjust run durations accordingly․
Avoid creating dependency․ Supplement natural food sources, rather than replacing them entirely․ Varying feed times and amounts prevents deer from anticipating meals, maintaining natural foraging habits․ Regularly monitor feed consumption to fine-tune your schedule for optimal results․

Troubleshooting Common Issues

This section addresses typical problems, like feed dispensing failures, timer malfunctions, and reduced battery life, offering solutions to restore optimal Pro Hunter 2 performance․
Diagnose and resolve issues quickly to maintain consistent feeding schedules and effective deer management with these helpful troubleshooting steps․
Feeder Not Dispensing Feed
If your Pro Hunter 2 isn’t dispensing feed, several factors could be at play․ First, verify the battery voltage is sufficient; low batteries can hinder motor operation․ Inspect the feed tube for obstructions – lodged corn or debris can block the flow․
Ensure the motor is functioning by listening for its operation during a scheduled feed time․ Check the auger for damage or binding; a broken or jammed auger won’t move the feed․ Confirm the timer is correctly programmed and hasn’t been inadvertently set to an inactive period․
Examine the feeder housing for any physical damage that might impede feed release․ Consider the type of feed being used; overly large or damaged kernels may cause blockages․ Finally, if the issue persists, consult the full manual or Moultrie’s support resources for further assistance․
Timer Malfunctions
Experiencing timer issues with your Pro Hunter 2? Begin by verifying the battery – a weak battery is a common culprit for erratic timer behavior․ Double-check the time and date settings to ensure accuracy; incorrect settings will lead to missed feed times․ Review your programmed feed schedules, confirming each time is correctly entered and activated․
If the timer appears frozen or unresponsive, try resetting it by removing and reinstalling the battery․ Inspect the timer housing for any signs of moisture or damage․ Consider external interference; strong electromagnetic fields can sometimes disrupt timer functionality․
For persistent problems, consult the complete manual for detailed troubleshooting steps or contact Moultrie customer support․ Utilizing the FEED HUB can provide remote monitoring and diagnostic information, aiding in identifying timer malfunctions․
Battery Life Concerns
Maximizing battery life is crucial for consistent Pro Hunter 2 operation․ Use only 6-volt alkaline batteries of high quality; avoid mixing old and new batteries․ Frequency of feed times significantly impacts battery drain – more frequent feeds require more power․ Consider using a larger capacity battery for extended run times, especially during peak seasons․
Minimize timer programming complexity; simpler schedules consume less energy․ Ensure the feeder housing is sealed to prevent moisture from corroding battery terminals․ Regularly check battery voltage, especially during colder months, as low temperatures reduce battery performance․
The Moultrie FEED HUB can monitor battery levels remotely, providing alerts when replacement is needed․ Proper winterization, including battery removal during extended periods of non-use, will prolong battery life․
Integrating with Moultrie FEED HUB
FEED HUB provides remote monitoring and control of your Pro Hunter 2, offering peace of mind and timely alerts regarding operation and feed levels․
Installation is straightforward, enabling hunters to check feeder status and receive low feed notifications directly on their smartphones or devices․
Installing the FEED HUB
The Moultrie FEED HUB installation process is designed for simplicity, allowing hunters to quickly connect their Pro Hunter 2 feeder for remote monitoring capabilities․ Begin by ensuring your feeder is powered on and within cellular range – a strong signal is crucial for reliable operation․
Download the Moultrie FEED HUB app from your device’s app store (iOS or Android) and create an account․ Once logged in, follow the in-app instructions to add a new feeder․ The app will guide you through connecting the FEED HUB device to your feeder’s control panel․
Typically, this involves plugging the FEED HUB into a designated port on the feeder and following the app’s pairing process․ You’ll need to enter the feeder’s unique ID, often found on a sticker affixed to the feeder itself․ Ensure the FEED HUB is securely mounted and protected from the elements for optimal performance and longevity․
Finally, verify the connection within the app and test the functionality by manually triggering a feed cycle and confirming the event is registered in the FEED HUB system․
Monitoring Feeder Operation Remotely
With the FEED HUB installed, hunters gain invaluable remote insight into their Pro Hunter 2 feeder’s performance․ The Moultrie FEED HUB app provides real-time status updates, including battery levels, feed levels, and operational history․
You can view a log of all feed events, noting the date and time of each dispense, allowing you to track feeding patterns and identify any irregularities․ The app’s intuitive interface displays this data in a clear and concise manner․
Furthermore, the FEED HUB enables remote control of the feeder, allowing you to manually trigger a feed cycle from anywhere with cellular connectivity․ This is particularly useful for testing the system or adjusting feed schedules on the fly․
The system’s peace of mind comes from knowing your feeder is operating as expected, and receiving immediate alerts if any issues arise, ensuring consistent and effective wildlife management․
Receiving Low Feed Alerts
A key benefit of integrating your Pro Hunter 2 with the Moultrie FEED HUB is the ability to receive timely low feed alerts․ The system continuously monitors the estimated feed level within the feeder hopper, providing proactive notifications when it’s time for a refill․
These alerts are delivered directly to your smartphone via the FEED HUB app, ensuring you’re always aware of the feeder’s status, even when you’re away from the hunting property․ Customizable alert thresholds allow you to set the desired notification level․
This feature prevents unexpected disruptions in your feeding program, ensuring consistent attraction of deer and other wildlife․ Avoiding empty feeders is crucial for maintaining established patterns and maximizing hunting success․
The FEED HUB’s proactive alerts save you time and effort, eliminating the need for frequent manual checks and allowing you to focus on other important hunting preparations․

Maintenance and Care
Regular cleaning, winterization, and proper storage are vital for extending the life of your Pro Hunter 2 feeder․ Protect your investment with these steps!
Consistent upkeep ensures reliable operation and optimal performance throughout the hunting season and beyond, maximizing your feeder’s longevity․
Cleaning the Feeder
Regular cleaning is crucial for maintaining the Pro Hunter 2’s functionality and preventing feed blockage․ Before any cleaning, always disconnect the battery to ensure safety․ Begin by removing any remaining feed from the hopper; discard old or moldy feed as it can attract unwanted pests and compromise the feed quality․
Inspect the hopper for debris, dust, and insect nests, using a soft brush or vacuum to remove any buildup․ Pay close attention to the feed dispensing mechanism, ensuring it moves freely without obstruction․ Wipe down all surfaces with a damp cloth and mild detergent, avoiding harsh chemicals that could damage the feeder’s components․
Thoroughly dry all parts before reassembling the feeder․ Check the motor and timer housing for dust accumulation, gently cleaning with a dry cloth․ Inspect the wiring for any signs of damage or corrosion․ A clean feeder operates more efficiently and reliably, extending its lifespan and ensuring consistent feed delivery to your target animals․
Winterizing Your Pro Hunter 2
Preparing your Pro Hunter 2 for winter is essential to prevent damage from freezing temperatures and ensure reliable operation․ Begin by removing all remaining feed from the hopper; moisture in the feed can freeze and cause blockages․ Thoroughly clean the hopper, as detailed in the maintenance section, to eliminate any potential food sources for rodents during the colder months․
Consider removing the battery and storing it in a warm, dry place to maximize its lifespan․ If leaving the battery connected, check it periodically to ensure it remains adequately charged․ Inspect the feeder’s housing and components for any signs of damage that could be exacerbated by freezing conditions․
Protect the timer housing from moisture and snow accumulation․ A well-prepared feeder will withstand the winter elements and be ready for immediate use when warmer weather returns, providing consistent feed delivery throughout the season․
Long-Term Storage Guidelines
When storing your Pro Hunter 2 for an extended period, proper preparation is crucial for maintaining its functionality․ Begin by thoroughly cleaning the entire feeder, removing all traces of feed to prevent pest infestations and corrosion․ Disassemble any removable parts, such as the hopper or dispensing mechanism, and clean them individually․
Remove the battery and store it separately in a cool, dry location․ Inspect all wiring and connections for damage, and address any issues before storage․ Cover the feeder with a waterproof tarp or store it indoors to protect it from the elements․
Ensure the storage location is free from extreme temperatures and humidity․ Periodically check the stored feeder for any signs of deterioration, and re-lubricate moving parts before re-deployment to guarantee smooth operation․

Frequently Asked Questions (FAQ)
Q: My feeder isn’t dispensing feed․ What should I do? A: First, check the battery level and ensure the timer is programmed correctly․ Verify no obstructions are blocking the dispensing mechanism․ If issues persist, consult the troubleshooting section․
Q: How do I connect my Pro Hunter 2 to the FEED HUB? A: Install the FEED HUB according to its instructions and follow the pairing process within the Moultrie app․ Ensure both devices are within range for a stable connection․

Q: What is the optimal feed schedule for attracting deer? A: This varies by location and season․ Start with a consistent schedule and adjust based on observed deer activity․ Utilize the ten feed time settings for customization․
Q: Can I use rechargeable batteries with my Pro Hunter 2? A: While possible, standard alkaline batteries are recommended for consistent performance and longevity․
Leave a Reply
You must be logged in to post a comment.